Prepare Your Classroom
1. Writing Process with clothespins
2. Million Dollar Word Bulletin Board- I put up the FAAVS (Figurative Language, Adjectives, Adverbs, Verbs, and Sense Words) As students use these in their writing, I post them on the bulletin board and we celebrate their accomplishment.
3. Have an area in the room for bins to place their writing notebooks, student resource folder, spelling dictionary, thesaurus, paper, pens, glue, etc.
4. Published Work- Display it then place it in their final copy portfolio (previous post). I also like the students to keep track of their writing. They can create links with the titles of their work and drape them across the room!
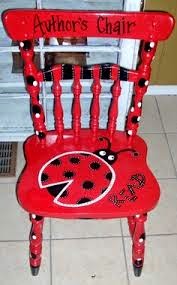
5. Author’s Chair- I love all of these!
6. Writing Center and Teacher’s group- Include colorful pens, erasers, and tape (or glue)
Mini Lessons
When teaching the mini-lessons, I suggest to bring the kids to the carpet or front of the room with big chart paper or white board to display anchor charts and whole group reflections. At the end of each week, do a quick check of notebooks by walking around the room and looking for one or more items in each notebook. List the pages on the board that students need to check. Give them 5 minutes to check over their work before you walk around and grade their notebooks. Keep track of their progress with a quick check rubric like this:
When Teaching Mini Lessons
1. Choose a mini lesson that addresses your students’ needs. Although I provide an order that works well with the writing process, always keep your students’ needs in mind. If they have a solid understanding of a particular skill, skip over or give a quick review. If you notice that they struggled on a particular skill on a previous writing piece, I suggest to put that mini-lesson in your plans earlier. In writing, nothing is set in stone! Of course we need to cover the standards but we also need to slow down for some students to have a better understanding of a skill and encourage other students to continue taking risks in their writing to uncover their talents. This order of mini lessons has been incredibly effective!
2. Make a connection to your previous lesson.
3. Tell what you will focus on that day. (Be excited! Your students will mirror your enthusiasm)
4. Teach the skill and reason for the importance.
5. Model an example of the mini-lesson.. I can’t stress enough the importance of modeling. Talk out loud as you model the lesson so students can hear your thought process. Purposely make mistakes along the way (especially when writing a rough draft)!
6. Have students collaborate (3,2,1….Focus back to the front) and share their thoughts with the class.
7. Summarize the lesson.
8. Invite them to try it with their own writing.
I have students write a 5-paragraph narrative writing essay over the course of several weeks. We go back to the same essay for each mini-lesson and make corrections or changes. Then the rest of our writing essays including opinion and informative are so much easier to teach.
Mentor Texts
Mentor texts are ways to use authors to help teach specific skills, strategies, or genres. It provides students with a good example of the lesson they are learning. Sometimes, it is perfectly acceptable to read a particular part of the story that relates to your lesson. I share Mentor Texts in my writing resources. However, you can always google the skill you are working on along with “mentor text” and you should find what you need!
HAPPY WRITING!!!!! CLICK
HERE FOR MORE INFORMATION!